Thursday, July 28, 2011
Red theme quilled butterfly and quilled hearts
6:25 PM
HANDMADE
BM013
Red theme quilled butterfly bookmarks with tiny quilled hearts :). A request I got from my customer who wanted me to combine a quilled butterfly and tiny quilled hearts in one bookmark. One for herself and the other for her loved one....so sweet hehe. Both bookmarks has their names engraved at the back of it as well. I cut out their names by hand. :)
These bookmarks have a different function. Not for marking books but for her to hang it in her car and in his car as well......hang them at the top view mirror hehehe. That is why I tied the ribbons with a knot at the ends that way. Not sure if the length of the ribbon is enough though to go through the top view mirror. I forgot to check these things out before I tied the ribbons to the bookmarks. Sigh.....hope it works out...
I love the paper I used for the back of the bookmark. It's a dark gray metallic paper. Love the way it shines when it hits the light. And it sure does have a good contrast with the red color too. Loving it! :)
Tuesday, July 26, 2011
Silhouette Portraits
6:45 PM
HANDMADE
I was so inspired by a wall art project on mousehouse the other day that I couldn't wait to do something similar but personalised. After a week of mulling it over, a bird on fabric became... my kids on paper! I did it a bit different to other tutorials I have seen so here's my steps in case you want to do one too (and there's lots of other project ideas at Our Creative Spaces).
First you need some profile photos... I found bathtime was easiest for this! Because I was doing two, I wanted them similar sizes, so I just opened both pics in a Word document and played with the sizes until they were similar and fitted on an A4 page (if you are a Photoshop ninja you could of course go straight to drawing an outline but I did it old school).
I like working with stencils, so you can try again when you stuff up use them again - I keep food boxes to use for this as they are nice light cardboard, just paste your printed photos (from your A4 Word document) on to the cardboard and when the paste is dry carefully cut out the heads (I changed some details with ballpoint pen first, like giving them necks!)
Then decide which way you want them facing, I wanted the finished pictures to look to the right, so I used the stencils pointing to the left (the photo-pasted side is facing down). Trace around on black paper (I got some nice matte black paper from an art shop for 35c) in ballpoint, add a soft point below each neck, then cut out carefully with small sharp scissors.
Once you have cut out the shapes, turn them over and you can play around with colour, yay! I was going to use scrapbooking paper but found this pack of mixed A4 paper on sale (wrapping paper or wallpaper would be good too). I had planned to use bright colours but Miss 4 insisted on the gold.
Then you just need to attach the black piece of paper - paste might make wrinkles so doublesided tape or a glue-snail is easiest.
Because I did two pictures on an A4 to start with, each one now fits nicely on to an A4 backing, and A4 frames can be cheaper to buy than other sizes (sometimes they are called certificate or display frames).
Other wall art posts we have done...
Sunday, July 24, 2011
Multi-Color quilling paper
6:22 AM
HANDMADE
In the midst of finishing up orders of handmade cards, I've also been busy with this new item I'm selling which is the shredded quilling paper. I just wanted to share some photos of the quilling paper I did for my customer recently which I love because of the mix of colors in each packet. :) Just love looking at the colors mixed together. Silly of me to think that way but it's true.....I love looking at the colors of the paper arranged together like that.
She requested I mix some colors of her choice in each packet. Each packet of 50 quilling paper strips has 5 different colors in each one of them. When I first saw the list of colors she requested I couldn't really imagine what it was going to look like until it was all done. I'm pretty happy with how it turned out. :)
Friday, July 22, 2011
BabyBites: When life gives you lemons..make cupcakes
1:17 PM
HANDMADE


I’m in love with Dear Colleen’s quirky ‘lemons’ prints for adults, so when I saw this post on one of my favourite blogs, Oh my! Handmade Goodness, I got very excited. These dinky little raspberry lemonade cupcake toppers were shared by Lisa from A House Full of Moxie and say “ when life gives you lemons…make lemonade cupcakes” – and to me it completely sums up life with two rambunctious little girls. When the day is going badly…let’s stop, get silly, and bake!
Perfect for the school holidays and the rain!
This wonderful little free downloadable set comes with cupcake recipe, printable cupcake toppers, wrapping paper, and cupcake stands. I’m in love!!
To read this and my other columns on Baby Bites online magazine, visit http://www.babybites.co.nz/
Thursday, July 21, 2011
Grateful for Mum... and Strawberry Shortcake
1:41 PM
HANDMADE
It seems like most days lately I have been thanking my Mum for keeping me sane, for helping or surprising me - but I was still blown away by her unearthing my original Strawberry Shortcake dolls!
Recently I got nostalgic about these childhood favourites, and tracked down some bargain replacements (see previous post here). Mum said she didn't know what had happened to my dolls, which is hardly surprising as it was a VERY long time ago. But somehow she found them!
They needed a bit of a wash which was a great holiday project for me and Miss 4 one day while Mr Toddler was having his nap. Soon we will get all the dolls together for dress-ups and a berry nice tea party!
p.s. My mum is so awesome that she made some of these clothes herself, and they are gorgeous. Thanks mum :)
Linking up with Maxabella Loves 'I'm grateful for'
Saturday, July 16, 2011
Red and green teddy bears
9:25 PM
HANDMADE
BM012
BM007
Red and green quilled heart and teddy bear bookmarks! Requested by a regular customer of mine who wanted these bookmarks to be in those colors with names hand-carved behind the bookmarks. :)
The green teddy bear is a design I've made before, so it's not something new. But the red one is new :). I uploaded photos of the green one anyways because the wordings behind the bookmark is obviously different and I just love how it looks hehee.
The size of the bookmark is standard in size but if you wish to write longer names, then the length of the bookmark would be longer otherwise it won't be able to fit in all the letters. You can view other samples of this type of bookmarks with names at the link HERE. :)
Shredded quilling paper
3:23 AM
HANDMADE
Since last year, I've been quilling using quilling paper that I shred myself using the mini paper shredder. You can view how I keep my quilling paper at the link HERE.
A lot of people keep asking me if I sell the shredded quilling paper and lately I've been thinking of doing so! I myself have never used quilling paper that are machine cut for any of my handmade cards, and that is why you can see that each quilled shapes I make have those rough edges. It's all because of the effects it gets from the paper shredder.
It was not easy though for me to figure out how to arrange those shredded paper in those plastic casings for sale, but I finally found a way that was easy for me to do it. Sometimes I find it therapeutic to arrange them nicely in those plastic casings believe it or not haha! I guess it teaches me to be patient and discipline and more organized in the process. So now I don't keep my quilling paper like how I did before. I keep them in this new technique I found and I find it so satisfying to see them so organized like those photos you see below hehe!
I think these shredded quilling strips are suitable for beginners too. First timers who are still learning how to quill will find this shredded quilling strips as a good deal for them :).
SHREDDED MULTICOLOR QUILLING PAPER 1
80GSM PAPER
SIZE - 3.5MM x 210MM
50 PIECES OF QUILLING STRIPS IN ONE PACK
5 COLORS IN EACH PACK
- 10 PIECES OF WHITE
- 10 PIECES OF SOFT PINK
- 10 PIECES OF FLUORESCENT PINK
- 10 PIECES OF CYBER PINK
- 10 PIECES OF RED
80GSM PAPER
SIZE - 3.5MM x 210MM
50 PIECES OF QUILLING STRIPS IN ONE PACK
5 COLORS IN EACH PACK
- 10 PIECES OF WHITE
- 10 PIECES OF SOFT PINK
- 10 PIECES OF FLUORESCENT PINK
- 10 PIECES OF CYBER PINK
- 10 PIECES OF RED
SHREDDED MULTICOLOR QUILLING PAPER 2
80GSM PAPER
SIZE - 3.5MM x 210MM
50 PIECES OF QUILLING STRIPS IN ONE PACK
5 COLORS IN EACH PACK
- 10 PIECES OF SOFT YELLOW
- 10 PIECES OF YELLOW OCHRE
- 10 PIECES OF FLUORESCENT YELLOW
- 10 PIECES OF ORANGE
- 10 PIECES OF FLUORESCENT ORANGE
80GSM PAPER
SIZE - 3.5MM x 210MM
50 PIECES OF QUILLING STRIPS IN ONE PACK
5 COLORS IN EACH PACK
- 10 PIECES OF SOFT YELLOW
- 10 PIECES OF YELLOW OCHRE
- 10 PIECES OF FLUORESCENT YELLOW
- 10 PIECES OF ORANGE
- 10 PIECES OF FLUORESCENT ORANGE
SHREDDED MULTICOLOR QUILLING PAPER 3
80GSM PAPER
SIZE - 3.5MM x 210MM
50 PIECES OF QUILLING STRIPS IN ONE PACK
5 COLORS IN EACH PACK
- 10 PIECES OF SOFT BLUE
- 10 PIECES OF TURQUOISE
- 10 PIECES OF SKY BLUE
- 10 PIECES OF DARK BLUE
- 10 PIECES OF PURPLE
80GSM PAPER
SIZE - 3.5MM x 210MM
50 PIECES OF QUILLING STRIPS IN ONE PACK
5 COLORS IN EACH PACK
- 10 PIECES OF SOFT BLUE
- 10 PIECES OF TURQUOISE
- 10 PIECES OF SKY BLUE
- 10 PIECES OF DARK BLUE
- 10 PIECES OF PURPLE
SHREDDED MULTICOLOR QUILLING PAPER 4
80GSM PAPER
SIZE - 3.5MM x 210MM
50 PIECES OF QUILLING STRIPS IN ONE PACK
5 COLORS IN EACH PACK
- 10 PIECES OF SOFT GREEN
- 10 PIECES OF FLUORESCENT GREEN
- 10 PIECES OF GREEN
- 10 PIECES OF MEDIUM GREEN
- 10 PIECES OF DARK GREEN
80GSM PAPER
SIZE - 3.5MM x 210MM
50 PIECES OF QUILLING STRIPS IN ONE PACK
5 COLORS IN EACH PACK
- 10 PIECES OF SOFT GREEN
- 10 PIECES OF FLUORESCENT GREEN
- 10 PIECES OF GREEN
- 10 PIECES OF MEDIUM GREEN
- 10 PIECES OF DARK GREEN
SHREDDED MULTICOLOR QUILLING PAPER 5
80GSM PAPER
SIZE - 3.5MM x 210MM
50 PIECES OF QUILLING STRIPS IN ONE PACK
5 COLORS IN EACH PACK
- 10 PIECES OF SOFT CREAM
- 10 PIECES OF SOFT PEACH
- 10 PIECES OF SOFT PURPLE
- 10 PIECES OF SOFT GREY
- 10 PIECES OF BLACK
80GSM PAPER
SIZE - 3.5MM x 210MM
50 PIECES OF QUILLING STRIPS IN ONE PACK
5 COLORS IN EACH PACK
- 10 PIECES OF SOFT CREAM
- 10 PIECES OF SOFT PEACH
- 10 PIECES OF SOFT PURPLE
- 10 PIECES OF SOFT GREY
- 10 PIECES OF BLACK
SHREDDED QUILLING PAPERSIZE - 3.5MM x 210MM
1 COLOR IN EACH PACK
50 PIECES OF QUILLING STRIPS IN ONE PACK
AVAILABLE IN 80GSM PAPER
25 COLORS TO CHOOSE FROM!
1 COLOR IN EACH PACK
50 PIECES OF QUILLING STRIPS IN ONE PACK
AVAILABLE IN 80GSM PAPER
25 COLORS TO CHOOSE FROM!
So yes, I am selling the shredded quilling paper now for those who are interested :). Do contact me at inaabdul_21@yahoo.com for the prices and how to purchase them. Thank you!! ;)
Thursday, July 14, 2011
For a best friend ;)
11:24 PM
HANDMADE
HB091
I'm so happy.....I finally finished designing this tri shutter card! My customer wanted me to design a tri shutter card for her best friend in a combination of red, black, pink and white. It's her best friend's birthday :). So I decided to focus more on the pink....using pink as the main color for the card as the birthday girl is so sweet and somehow I think that pink suits her best :).
As always when it comes to making tri shutter cards, I'm always having a hard time figuring out how to decorate it. As you can see, there's so many spaces to decorate. The more I study about tri shutters, the more I think I'm thinking too much about the design hehehe. Because I do see other designers decorating them in a simple yet beautiful layout. So I'm trying my best to be simple here but, oh well, I'll leave it to you to judge if it's simple or not hehe.
I made the patterned paper myself. Decorating a blank paper with polka dots and also stamping it with a floral rubber stamp design. I had fun stamping and decorating it with seed beads and tiny red flower sequins....somehow it makes me feel like a textile designer all of a sudden haha!
I really hope the birthday girl loves her birthday card! ;)
p.s. I had to cover up the faces of the people in the photo for privacy purposes. It's a request from my dear customer. ;)
Wednesday, July 13, 2011
Best Fishes
2:24 AM
HANDMADE
BW002
Best fishes! Or shall I say Best Wishes! hehehe! I've seen a lot of people making cards with this wordings on it and I just couldn't help but make my own version of it. :) I even saw a clear stamp during my visit to a craft store recently that has those wordings with a couple of fishes too. It was so cute but I couldn't afford to buy it at the time hehe. So I thought why not make a couple of quilled fish instead. Never made one before. So I gave it a try. This is how it turned out! :)
I was thinking of stamping the words on the paper but each time I stamped the letters, I kept making mistakes and it looked so ugly. So out of frustration, I decided to write the wordings myself! hehe!
What I love about the card is that this is the first time I'm experimenting with a new technique that my fellow quiller Asma' has taught me. She did an online tutorial at her blog about her Royal Flower. I haven't the chance to try and do the Royal Flower yet but I did try the technique of curling the loops like how she did with her Royal Flower. And it was fun! I love the effect it gives. :) I also tried to curl the coils in the body of the fish. Look closely and you can see what I was trying to do :).
The card is not completely done yet....haven't done the envelope and was thinking of making a pop up inside it too. Still in the thinking mode but had to share the design here first hehe. Couldn't help myself, LOL! :D.
Monday, July 11, 2011
A little update
3:01 AM
HANDMADE
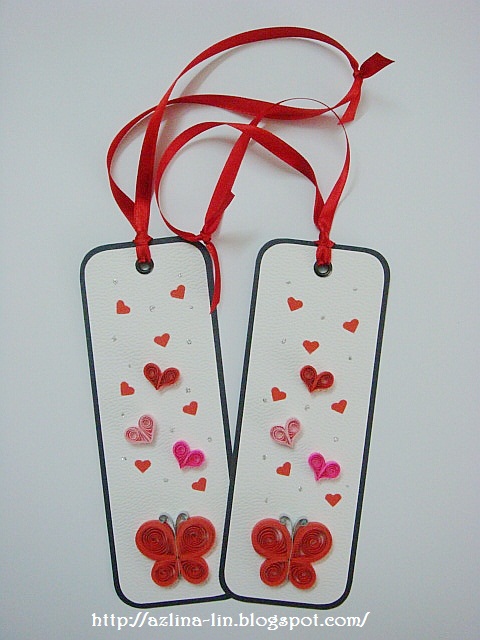
Ever since I came back from my week long vacation, it has been all about work work work. Non stop action till now. At the photo above you can see what I'm currently working on.....it's some bookmarks with hand carved names on it and a tri shutter card....plus some other card orders that are long due for delivery. :S
Honestly, I'm still not fully recovered from the week long vacation ehehehe! I'm still in the vacation mood. :P. Trying my level best to cope with work and making sure things are running smoothly. Still, there are some minor hiccups here and there.
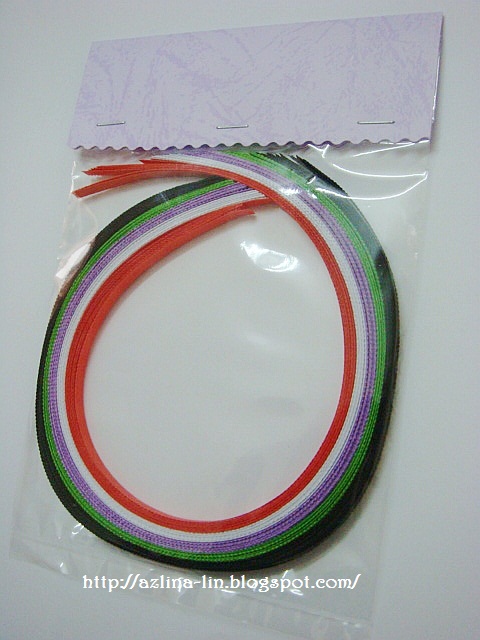
For instance, today, I got a call from Pos Malaysia asking me to collect a couple of Posexpress packages that I posted yesterday containing some quilling tools that my customer ordered from me. It seems that now the rules are more strict. No more are we allowed to post craft products using the Posexpress envelope or boxes. We are only allowed to post items like letters or documents in Posexpress. So from now onwards, I won't be using the Posexpress anymore to delivery craft products. Perhaps if I were to send cards, it is possible to post them using the Posexpress boxes. But still, I'm not taking any chances with the Posexpress envelopes. It's too risky. Looks like it's going to cost more for my customers when it comes to delivery because I have to use Poslaju but at least it's safer. :)
For those interested to order my quilling tool, I'm sorry to inform you that it's already sold out. I'm now waiting for the new stock to arrive. Once they arrive I will be sure update everyone at my Facebook Fan Page. :)
Oh...when I was on vacation I did visited some craft shops in KL and one of them was Art Friend at Midvalley. Finally I get to visit the place! Thanks to a friend of mine who was kind enough to take me there :). It's huge and has so many kinds of craft and art stuff to explore. It's different from other craft store I've been to before. I think art students would love this place so much. I know I would if I was still studying....it's definitely heaven! :)
I had a great time scouting out for new things in KL to experiment with. I also bought some books to learn some new techniques in paper crafting. Unfortunately, till now I haven't the time to go through them. Too busy with orders and stuff and no time to play with my new toys huhu. Hopefully I'll get around them soon. There is so much to do and time is pretty limited. But I'll be sure to try at least one project at a time before the year ends ;).
Saturday, July 9, 2011
Where to find... More Handmade Rings
2:45 PM
HANDMADE
Rings are definitely my favourite kind of jewellery, I love that I can see them all the time (I never remember to wear earrings!) I don't have to worry about them catching on things, and they instantly make me feel more dressed up. Because they are small they are also great for buying online, and handmade ones can be reasonably priced for something special. I am always on the lookout for more, these are some I have seen recently...
Custom Braille Ring, studio AMF
Macrame and Silver Stacking Rings, Lunatic Art
Baby Elephant Ring (with diamonds), Michelle Chang Jewellery
Woodgrain Ring, That Vintage
Cookie Dough Ring, Beat Black
Rick Rack Ring, Christina Lowry Designs
(Previous post on personalised rings here, I never take mine off!)
Macrame and Silver Stacking Rings, Lunatic Art
Baby Elephant Ring (with diamonds), Michelle Chang Jewellery
Woodgrain Ring, That Vintage
Cookie Dough Ring, Beat Black
Rick Rack Ring, Christina Lowry Designs
(Previous post on personalised rings here, I never take mine off!)