This is default featured slide 1 title

Go to Blogger edit html and find these sentences.Now replace these sentences with your own descriptions..

This is default featured slide 2 title

Go to Blogger edit html and find these sentences.Now replace these sentences with your own descriptions..

This is default featured slide 3 title

Go to Blogger edit html and find these sentences.Now replace these sentences with your own descriptions..

This is default featured slide 4 title

Go to Blogger edit html and find these sentences.Now replace these sentences with your own descriptions..

This is default featured slide 5 title

Go to Blogger edit html and find these sentences.Now replace these sentences with your own descriptions..

Search This Blog

Wednesday, August 31, 2011

Sunshine in the Mail


Mail swaps can be stressful (as I found out when I overcommitted myself last Christmas!) but this week I received a gorgeous present thanks to Seaweed and Raine's stress-free 'Sunshine in the Mail' swap. My package *all the way from Australia* was so big that I clearly needed help opening it.


The swap was a blind one so I didn't know where it was coming from - what a lovely surprise to be spoiled by designed-to-a-t. This beautiful handmade bag was snapped up by Miss 4 as it perfectly fits her new favourite toy, but I am keeping the matching card with sewn-on ric rac (don't you love ric rac!)


This sweet poster came complete with clipboard for displaying!


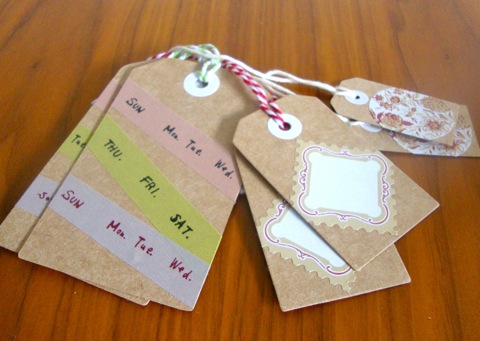
And these pretty tags are a welcome addition to my stationery stash (do you think that is washi tape? I  need to try some...) It really was a lovely package, thank you so much Terese   :)


I sent my swap package off a couple of weeks ago because it had to go all the way to New York! I made the rosette brooch from lily pad scraps and sent some stationery from New Zealand designers...


I hope Lissa enjoys them, you can see her lovely drawings and photos on her blog A Chance of Sunshine. If you have ever thought about entering a swap, keep an eye out for an easy one like this and sign up!

Tuesday, August 30, 2011

Welcome home...from Madi bleu!


Welcome to my new home. It's a 1930s bungalow, still with original stained glass door...


Which opens to reveal a 'grand' entrance hallway (well, it's grand for someone who's never had a hallway before!). Welcoming in our visitors in pride of place is....


Us!
Courtesy of the fabulous Madi Bleu (NZ artist Amanda), we've proudly hung a personalised family portrait of me, hubbie, Maddie and Lorilou and our wee dog Oscar.

I've loved Amanda's textile and upcycled collages made from fabric, zippers, buttons, vintage scraps and other loved items for a long time now, and blogged about her before on babybites. In fact it was her creations gracing a fabulous striped wallpaper wall that first inspired me to try designer wallpaper in my own house.

So when she notified on her facebook fan page that she would be taking orders for 'family portraits' I jumped at the chance. All I had to do was send in a photo...and wait for a 2011 moment in time to be immortalised into a special Madi Bleu for a forever keepsake. Thanks so much Amanda, you are hugely talented!

Monday, August 29, 2011

Loving...pretty shops no 2


Last week Greta wrote a lovely post on this blog about her favourite pretty shops..we didn't converse about her post before she wrote it, as I have been quite ill for a couple of weeks and out of 'blog action'. But if we had, I definitely would have suggested she add Floozie NZ Design store in Silverdale, Auckland.


It's a gorgeous mix of vintage home decor, children's toys, women's accessories...and just - good old fashioned knick knacks. You know the kind of store where you could buy a million things? I think the next time I go, it will be with a set budget burning a hole in my pocket...which just MUST be spent.


I've borrowed a couple of pictures off Floozie's facebook page...I hope she won 't mind...but I just have to encourage you hop over and have a look!


Thursday, August 25, 2011

Loving... pretty shops


Yellow Brick Road

Have you ever daydreamed about having a cute little tea shop, or a gorgeous boutique selling pretty clothes, jewellery and gifts? I definitely have and it is a bittersweet feeling to find out someone else has already done it, but I love discovering them! I am always grateful for a little treat or some window-shopping (linking up with Paisley Jade's 'Things I'm Loving').


The Tea Lady (pic by Kute Kiwi)

I had been meaning to visit The Tea Lady ever since I heard about it - Birkenhead isn't far away and the website is super-cute... I don't drink real tea but love fruit teas and there were lots to choose from. My sister and I took my mum and my auntie, and after playing musical tables (there are only about 5 tables, thank you so much familiar-looking-lovely-lady who swapped tables twice to accommodate others!) we had tea and a big fluffy scone each. The vintage decorating includes polka dots, florals and retro toys, the perfect girly outing (thanks to Kim @ Kute Kiwi for the photo, her tea party-friendly blog is here).


I found Yellow Brick Road online a few months ago and couldn't figure out where in Parnell it was... it is worth the effort to find (and not that tricky really, just past the gelato shop) and so, so pretty. I haven't actually bought anything yet but am very tempted by these pads and a lot of the jewellery. The clothes are lovely too (see more on their blog).


Little Craft Store

Are there any other pretty shops (in Auckland or anywhere else) that you would recommend? Next on my list is The Little Craft Store, although I don't think I will be able to restrain myself from spending there...


Note: Not a sponsored post, just things I like    :)

Saturday, August 20, 2011

Miniature ketupat on cards

HR023

My one and only raya card designs this year is mainly based on the ketupat as the subject matter. In this case, they are miniature ones.....as small as the 10 cents coin...hehehe. I used the smallest ribbon I have in my collection and made these teeny tiny ribbon ketupat and arranged them in the simplest way. 

The design is so simple. But I used pretty card stocks for the design to give it a really nice touch. One is a metallic white card stock and the other is metallic gold in colour. It's so difficult to get a really good quality white card stock around Alor Setar but I was lucky to find one recently and it's the only one left in stock at the shop! So I bought one whole rim of it! LOL!

The card is an A6 size card and I'll just put simple raya wishes inside it. This is for my own personal use. I think I'll have some time this year to send raya cards for my relatives and friends......well, I hope I'll be able to post them that is....hehehe.....as I never seem to have the time to do so. :P

I have to make some for my Mom to use as well, she wants to send some raya cards to her friends......she's always looking forward to get free cards from me heheheeh...... :D Well, with simple designs like this, perhaps she can. ;)


Friday, August 19, 2011

Happy 33rd Birthday

HB092

I've been having issues with my computer for a while now but I didn't want that to effect my work and alhamdulillah so far everything is under control. I managed to get all my orders done on time. This is the last handmade card order for this month and soon I'll be able to concentrate on other projects at hand. Yes! Yes! Yes! Can't wait to start on the other projects hehehe. :)


I'm not really good at making cards for the guys.....as you all know by now, most of my designs are very girlish hehehe. So it's always a bit difficult for me when I have to design a card that needs to look manly. My customer did request that the card should be in colours like black, red and gold colours so I combined all those three colours for this birthday card. I used my metallic gold card stock which I love so much and add in the other two colours to it. 

I decided to use ribbons and beads to decorate the card with. I love using this technique to mix and match a few types of ribbons together. And adding those beads to it too really does adds a special touch. The black polka dots were glued on the metallic gold card stock one by one. I marked the places where the dots should be and glued those paper polka dots on it. Frankly I love doing that.....just love looking at it when it all comes together.

My customer wanted me to use a similar pop up from the HB059 card design for this birthday card and so I did, but I changed the color combination to match the colours of the card and I also changed the wordings on the big pop up heart. I've also done another similar pop up pattern at this V022 card...you can click on the links at the card codes to view the cards :). So this is the 3rd time I've done this type of pop up and I realised how patient I need to be to glue all those tiny hearts on the pop up heart one by one. It took me hours to get it done. I've forgotten what feels like to do it since I haven't made this type of pop up in a very long time. All in all, I'm pretty happy with the design and hopefully my customer feels the same way too! ;)


Wednesday, August 17, 2011

Ketupat on bookmarks

BM015


BM016


BM017

I was requested to make 3 paper beaded bookmarks recently. My customer was interested in a bookmark design I made long ago from my Anilza Beads blog. The bookmark has a name on it and some shapes of stars scattered on it too. All carved out by hand. Check it out at the link HERE.

So I did a similar design for the 3 bookmarks she requested with 3 different names and colour combinations. My customer also requested that I added a ribbon ketupat at the back of the bookmark and leave some space below it for her to write some wishes on it. So I thought why not paste a small piece of paper below the ketupat for her to write on because the colour of the bookmark is quite dark and it would be difficult to see the wordings on it if she writes on it using a regular pen unless she has a special light coloured ink pen. So that's the reason for that small piece of paper below the ribbon ketupat :).

I have to say I had fun making those ribbon ketupats last night. I haven't made any since last year. ;) So this was a fun little project eheheheh :).

Saturday, August 13, 2011

Aarrgh-some Pirate Party

pirateship

We were lucky enough to go to an amazing pirate party last weekend, some friends went all out for birthday #4. After a pirate ship table was spotted on pinterest, Dad was asked to rig something up - but he built a wooden ship around his desk instead! It was incredible.

piratepainting

Dad also happens to be a painter, how cute is this?

pirategame

My daughter is pirate-obsessed so she loved everything, including pin-the-parrot-on-the-pirate.


The cupcakes were yummy and the 'Sea Water' was shark lollies in jelly (like Aimee's 'Fishpond jelly' here) .


A wooden treasure chest had also been constructed, with take-home treasure for everyone at the end of  a photo-clue treasure hunt.


(My exhausted babies at the end of a very busy party - couture pirate vest by Nana!)


(Note: The pirate ship attachments are actually for sale on TradeMe this week if you can see a pirate party in your future...)


Other party posts:

Thursday, August 11, 2011

Our 3rd Anniversary

AC007

About a month ago, I received an order to make a tri shutter card for my customer and in the beginning I thought I was not going to be able to pull if off because the idea for the card just never arrived when I wanted it to. It came at the very end. haha! That is usually the case with me. Ideas, don't come by whenever I want them to so I took quite a while to get this order done. But I was so happy that I managed to get it done on time :). 

My customer requested that the card be in red and black in color. She did liked the TOY002 tri shutter card that is red and black in color too but I wanted to try and do a different design for her instead. I don't have pattern papers in hand. Never bought them before. The only ones I have are the ones given to me by a friend and I prefer not to use them for my customers as I wish to use them for myself hehehe! So, for my customer I design the patterns on the card on my own simply by creating patterns using foam hearts, beads and shapes of hearts made by heart shape craft punch. The silver polka dots are actually paper dots made by a new craft punch I bought recently. I just love using it to make those polka dots patterns. hehe!

This card is definitely not something easy for me to make and it really did tested my patience and ability as a card maker. I need to practice more to make it better in future. :)


Tuesday, August 9, 2011

New House: Room 3


So the lily pad family has moved into our new house, and the interior decorating is coming along at full speed. Room One - the lounge, is all complete apart from my own art work I'm working on, and hanging of the navy patterned wallpaper. Room Two - the girls combined room - is all complete and looks exactly like the mood board! They love it and putting them in together has made them firm little play friends too.

Room Three - is the combined kitchen and family room area. This is the area that 'sold' me the house when we came to look it at. I could picture us using this room all day, every day - and that's exactly how life is unfolding in the three weeks we have been here.
The kitchen is a light white/cream colour, with louvre servery windows above the stove and coffee nook that open out onto a breakfast bar on the deck. We use this mostly for coffee and cake so far, BBQs will come in the summer! The dining/family area wraps around the kitchen, and leads to same 'outside room' as the breakfast bar - a fully covered deck area - which lets in the sun and keeps out the rain.


The look I wanted was a holiday /weekender/ cafe style. So I've gone with a relaxed feel that mixes and matches furniture types of white lacquer and beech wood and red metal, and I really love the look of it. I've proudly purchased a couple of New Zealand artists' prints from Endemic World and Etsy in a food and drink related theme - Bron Alexander's "Daily Grind", Dear Colleen's "When Life gives you lemons, drink gin and tonic" - and my own New Zealand-themed cavases and applique cushions sit alongside. (Yes, I've yet to buy a frame for my family tree I completed on Friday. I will probably also purchase a joke 'keep calm' print about curries.)

Outside, we've gone with black wicker couches like a cruisy cafe. The sun shines in all day and friends have commented that sitting out on the deck outside feels like you've gone on holiday. I just love it! As well as the moodboard, I thought this time you might like to see the real deal.


What's next? Room 4 is our bedroom, which is changing all the time! Might have to wait a while for that one!!