This is default featured slide 1 title

Go to Blogger edit html and find these sentences.Now replace these sentences with your own descriptions..

This is default featured slide 2 title

Go to Blogger edit html and find these sentences.Now replace these sentences with your own descriptions..

This is default featured slide 3 title

Go to Blogger edit html and find these sentences.Now replace these sentences with your own descriptions..

This is default featured slide 4 title

Go to Blogger edit html and find these sentences.Now replace these sentences with your own descriptions..

This is default featured slide 5 title

Go to Blogger edit html and find these sentences.Now replace these sentences with your own descriptions..

Search This Blog

Monday, January 31, 2011

Lil Magoolie roadtests the lilypad - and giveaway!


Today was a super highlight for me professionally - Maddie at L'il Magoolie reviewed my lily pads and it was a super brillant review with lots. Of. Exclamations! I was thrilled as we think L'il Magoolie is THE coolest design blog for parents in New Zealand.

Here's a snippet of what Maddie said:


Oh. My. God. I have fallen in
love with this thing. Instead of having to regularly wrestle the carseat out and
shake out food/toys/miscellaneous items that seem to always find their way down
the side of her seat, I just remove the liner and shake it out and/or wash it.
So easy! It’s great that the fabric is a breathable cotton instead of the
polyester on Aspen’s seat so she’s not Little Miss Sweaty-Neck at the end of
every trip. Plus it looks great (we’re sporting a lovely grey and yellow fabric)
and is very robust.

Also? It’s sometimes hard to see how well an item is
made when you view it online and I was very pleasantly surprised to find that
the attention to detail in its construction was top notch.

To celebrate, Maddie asked if I would consider doing a giveaway...to which of course the answer was yes! So, if you don't have a lily pad yet, or would like another please enter (I use one for the shopping trolley, two in my car seats, and another one in my baby's pram - that's the bonus of being the inventor I suppose!).

To enter the giveaway, hop over to Maddie's blog, and leave a comment on the blog post on my lily pads. You get extra points for facebooking it or tweeting it. Don't forget to follow her blog - it's a fantastic discovery point for new designs, new Kiwi products, and international trends!


Good luck!!!

Sunday, January 30, 2011

Temporarily closed


Dear readers and customers of LHGC,

I am truly sorry to announce that I will be taking a break from work for a while. :(  I won't be able to take orders till further notice. This is due to the problem I'm facing with my computer. I have not been able to solve the problem yet and it's difficult for me to work under this condition.

I'm posting this notice before things gets worse. I can't even use my Yahoo Mail.....even my Facebook is having problems....and now I can't even access my Nuffnang account. I have no idea why. Perhaps they are under attack by something huhuhu..... :'(

So yes......we are temporarily closed until further notice. For customers who have already ordered  cards and made payment to me....do not worry,  I will get your orders done for you as promised.

Sorry for the inconvenience. I will update on the development once I get my problems resolved. 

Thank you.

The launch of "I {heart} re-designing"


As well as creating new projects from scratch, or buying glorious fabric to hide away and then deciding what to do with it later, a lot of my creative time is spent “re-designing”.

This realisation only hit me on holiday this year, when I started making a ‘to do’ list of my upcoming creative projects for the year. Most of them revolved re-creating something to give it a new lease on life. Generally it’s something old, that could be useful when used a different way; or could be prettier if it was recovered or repainted; or it could be a project partly made from something I saw and bought just the other day, and had to ‘improve’.

Sometimes my re-designing is because our little family is run on a tight budget. Sometimes it’s because we are forever renovating and fixing our old house. And sometimes it’s simply a time-passing away/busy fingers moment or a way to de-stress after my day job. But mostly, it’s because I love something, can’t possibly throw it away, and need to re-use it to justify keeping it. (That's when it counts as not hoarding, right?)

So I started talking to my wonderful partner in this blog, Greta, and we decided that between us, we have a million projects already finished and sitting around, under construction or on the 'to do list' this year that fit this bill. Some of them include:


• Reusing cool old boxes and Formula tins as kids toy tidies, covered in fabric;
• Rescuing abandoned rattan furniture in the inorganic collections, rethreading the twine in the broken seats, and repainting them (I’ve done this twice!)
• Reusing the old kitchen bench as a new computer desk in the study
• Recovering the old dining table chairs with a funky black vinyl, totally changing their look
• Rescuing old wooden furniture off family and friends, sanding and repainting it to give it a new life
• Reusing favourite clothing pieces or tea towels to make new cushion covers
• Cutting up an old Trelise Cooper top I can't throw away (but will never fit again) to make a sun hat for my baby
• Changing an old 80s pattern into a modern ‘sloppy joe’ sexy t-shirt
* Fabric painting designs on clothing or shoes
• Repurposing a little girls Butterick pinafore dress pattern into a strappy sundress and piecing together some favourite fabric offcuts to create a modern look.

So one sunny afternoon on holiday I decided that while they don’t always involve fabric, my projects always involve craft, colour, family and love, and they should count as writing fodder for this blog. And Greta agrees. Some of the above list (which we will come back to and hyperlink as we go) could even be ‘tutorials’.

We’ve designed a little button that will identify these “re-design” projects so they’re easy to spot (see left). We’d love it if you could use it too on your blog posts about your re-design projects, and link back to ours, leave a comment below, and share the ideas around. We'd love to create a master list of great re-design ideas (we've even made a special tab at the top of our blog to keep them handy). Some of our favourites by others we'd love to be there include:

Cotton Kiwi's Sock Monkeys and Vintage Tea Cup pincushions (I have made two monkeys, with two more half finished for presents)
• A Little Vintage’s custom made dolls that use heirloom fabrics and baby clothes (I have four so far made in my special fabrics)
Songbird Designs' fabric covered hair bobbles (I own TONNES of these)
Amy’s Button Necklaces.
Moon Mum’s vintage wallpaper and buttons birdie art (I used these in my baby's room)
* Turning your husband's shirt into a little girl's dress on Made by Dana (I promise to do this in Feb, this month coming! I have chosen the shirt)
• Turning a kid's t shirt into a dress on Make It or Love It
Made by Rae’s ‘altering’ of patterns from McCalls.

My first offical “I love re-designing” post will be “The One Hour Sloppy Sexy Joe” t shirt. Watch this space!

Saturday, January 29, 2011

Life is sweet Quilling Blog Hop

AO053

Hi! Welcome to the "Life is Sweet" Blog Hop! I've been invited to join in the quilling blog hop by Leesandra Diaz from The Sweet Spot Cards. I haven't been well lately but I tried my best to get one design done for this special occasion. I hope I get to blog this on time hehe! It's a last minute thing! huhu! 

This is my first time ever to participate in a quilling blog hop. There are about 13 participants in this quilling blog hop from 5 continents. I have added the list of quiller for you to view below. Some of the participants are handing out blog candy as well! It would be great to check it out as you blog hop from one blog to another.

I made a design that is related to the theme itself. It's something I've never done before so I was super excited about making this ice cream cone. It's sweet hehe! Well.....it's ice cream....it's suppose to be sweet right? LOL. And like life.....we are suppose to enjoy it....just as much as we enjoy our ice cream. And I wrote something inside the card as well........something to relate to the wording on the card. "Life is sweet.......sweet like, you and me!" hehe! ;)

Thank you for hopping by here and do hop to the next quiller in line on the list! It's Amna! Have fun hopping! ;)


North American Quillers:


South American Quiller:

European Quillers:


Asian Quillers:
YOU ARE HERE : Lin - http://azlina-lin.blogspot.com/


African Quiller:

Australian Quiller:


Friday, January 28, 2011

Grateful on Saturdays...

One of our very first followers of this blog, who leaves lovely comments, is Maxabella. Her blog is divine with lovely posts about family, sewing, crafting and baking, and blog design is definitely her forte too. Check out today's gingerbread men 'friends' image.

Anyway, Maxabella is spreading some 'sunshine' around the bloggy mum community by asking people to once a week write a post on something they are grateful for. Today's my first time I've really, really had a lot to be grateful for, after a hard last year personally. But that all pales in comparison.

Today I'm grateful that three incredibly special, treasured people in my life are still here, and battling on, and I just wanted to let them all know how grateful I am for them. To have them in my life. And how much I will do anything for you, and your families, anyplace, whenever. You are all my thoughts this week.

Sending so much positive thoughts and power your way I can see the air sparkling! xoxo

Floral Fantasies Candy


I haven't been able to blog for the past few days now. Not well actually. But since I'm feeling a little better now, I'm gonna enter a blog candy tonight..hehehe. Yes, it's more candy from Floral Fantasies! I'm entering it again. I wasn't lucky the first time so I'll keep on trying and trying and see if there is any luck for me to win these wonderful candy from this blog. 

This blog candy will run till 24th of February! Come and join in the fun! :) Go to the link HERE to enter!


Thursday, January 27, 2011

Berry Obsessed


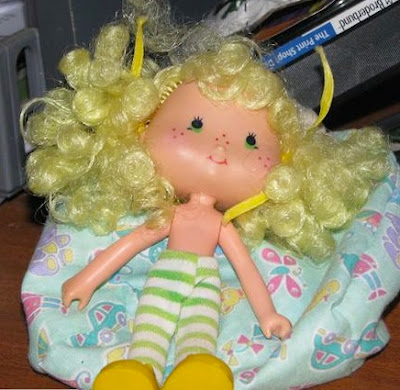
If you were a little girl (or a mum!) in the 80s you may recognise this little lady - an original Strawberry Shortcake doll, complete with enormous hat and berrylicious smell.

Recently I started obsessing after I saw these ridiculously cute hats by susyq19 on Etsy. My daughter has a couple of the recent little dolls but they do not have such over-sized heads and cheeks, or fabric clothes.

I had two Strawberry Shortcake (SSC) dolls when I was young, Strawberry Shortcake herself and Lemon Meringue, who with her big yellow curls and pretty little face was my idea of perfection. So I searched Etsy (did you know they sell vintage as well as handmade?), eBay and TradeMe looking for these relics of my childhood (I have no idea what happened to my ones...)


Now that they are 'vintage' of course, they can be pricey, but I think the fact that they have lasted so long means you can compare them to what is new in the shops now. My new SSC friend (pictured on my strawberry fabric stash, another obsession of mine!) was $18 on TradeMe, including postage, and she is in great condition, with all her clothes and only a little fading on her cheeks.

After a little research I found out she is actually a first edition, which means she was issued in 1979! You can tell by her flat hands, and she didn't have her pet cat Custard until the second edition, so she isn't missing anything. I am quite chuffed   :)

My second purchase will need a bit more TLC, the seller thought it might be Angel Cake but I think it is a Lemon Meringue... hopefully she will arrive in the post today...

Start ‘em young - sewing for preschoolers!


Some of my earliest memories are of my Mum sewing clothes for my sisters and myself. So when I spotted this little plastic sewing machine that really sews in my kindergarten’s school book and gift guide, I had to have it for my nearly five year old. I knew it wouldn’t last long, but it was a start, and it was going for a song. Little Miss loves to sit next to me when we’re crafting, helping to glue, paint, staple, or pin or play with a needle and thread. So you can imagine my anticipation on Christmas Day of what she’d say. She loved it!


The only glitch so far is that the bobbin eventually jumps right out of its casing, and causes the stitches to catch and wind around and stall the machine. I’ve solved it so far by laying a cut down piece of wire or ice block stick over the top of the casing, inside the hatch door, to keep it more snug in its place. But we’ll have to wait and see how long that lasts!


What's a good first project for her, do you think?

Wednesday, January 26, 2011

The Photo Shoot Area of the New Studio Location.

The shooting area ... a work in progress ... but getting there! Taking appointments for portrait work ... as well as rentals from fellow area photogs. Call 207-299-2869.
Looking forward to a great run in this new space. Wait till you see the rest!

~ Jodi

Monday, January 24, 2011

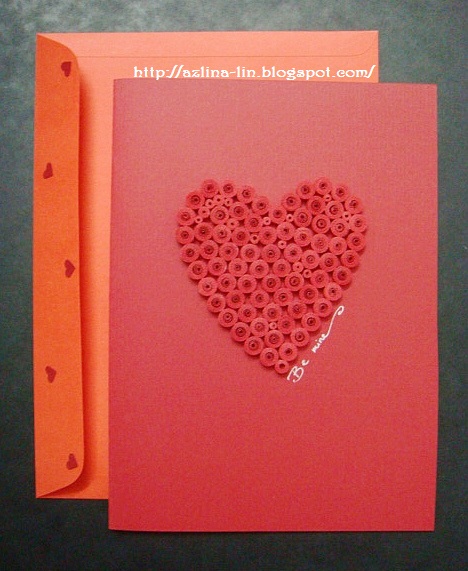
Be mine

 V046b

I'm sure a lot of people have seen card designs that are made using just one type of color.....like white or off white. I've seen a lot of those lately and inspired to do the same. But instead of white decorations on a white card.......I decided to do red on red simply for Valentine's day :).

I love the chubby heart so much and wanted to give it a new twist. Usually I would use a smaller card stock whenever I make quilled hearts, but this time I decided to go just a little bigger. Just a little hehe! And I can see that the chubby heart looks right at home with this size of card. It's just nice. :)

If you look closely......most of the tight coils I made are of the same size....except some teeny tiny ones that I made to close the gaps in between the tight coils. I kinda like this method better than the ones I've done before actually hehe. I think in future, this is how I will do it for all my new quilled heart cards.

The card above is the same as the card below except for the wording "Be mine" on it. ;) Just wanted to see the difference between the two. Some prefer the quilled heart without any wordings and some prefer some at the side of it.


V046a


Sunday, January 23, 2011

Anzac-ifying my house...typography style


For around six months I’ve had an idea in my head for a new painting in my house and finally, I’ve done it. This time I tried something completely new in terms of technique, and inspired by my partner in OTLP, Greta @ Topography.

An art history student way back when, I particularly love modern art and some of my favourite pieces are ones by Toulouse-Lautrec and New Zealander Colin McCahon which use hand drawn or stencilled words. I don’t necesarily like political messages, but more the forms of words and the use of them as creative expressions of the brush themselves. As a journalist by trade, I have a thing for words.

So therefore it's pretty logical that I adore the new fashion trend of using Typography in interior design fabrics, nursery fabrics, and on canvas art works, particularly in black and white.
I wanted to do something totally unqiue to our family though, so armed with a piece of graph paper, I came up with a combination of words and numerals important to my New Zealand childhood and my husband’s Australian childhood. Using the graph paper squares, I spaced them according to the different widths needed for different sized fonts and then hit the craft shops looking for stencils to fit. I also bought some scrapbooking letters, to use as a stamp when wiped generously with oil paint.

Miss Four and I painted the canvas black, and then used white oil paint through the stencils and on the back of the scrapbooking letters, as stamps. I actually love how it came out partly looking hand-drawn and partly like place name signs. Alongside my extra large size canvas I did a few years ago featuring flax and toi toi, and my new fantail cushion, and my treasured Aboriginal bird painting, I feel like I’ve ‘Anzac-ified’ my house appropriately.

What do you think? Might pop it into the Creative Collective's January challenge to try a new craft and share it...

Saturday, January 22, 2011

Floral Fantasies January Candy!


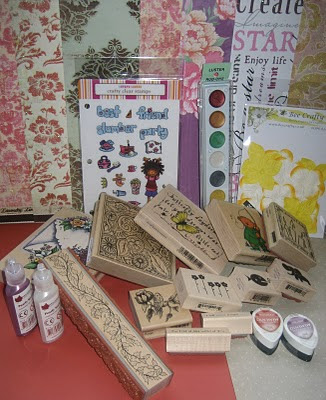
Oh my gosh!!! Just look at those stamps!!!! If only they were mine mine mine! hahaha! Sorry, please excuse me.....I'm a bit over excited looking at those delicious candy offered by Floral Fantasies. :D

Miss Brenda who is the blog owner of Floral Fantasies is holding her first blog candy for this year.....and the candy she is offering includes gorgeous glittered MME DP's, mounted and unmounted stamps, ink pads, flowers, pearly doodles, metallic rub on's and cardstock.

Her January candy ends on Tuesday, 25th of January 2011. So I still got time to enter it and stand a chance to win this wonderful candy :).

If you would like to participate in this January candy you can enter it by clicking at the link --->  HERE.


Really Reasonable Ribbon's Giveaway!


Really Reasonable Ribbon's Ramblings is holding a giveaway! Their blog is approaching it's one year anniversary and they are celebrating it by holding up this wonderful giveaway to thank their readers. I've just become their new reader! hehe!

I love those ribbons and but what really caught my eye is the Scor Buddy Mini Scoring Tablet! So cool! It's definitely one of the things that any card maker would want to own. :)

I'm trying my luck for this giveaway. Really hope to win it! :) They will be drawing out a winner on the 26th of January 2011. If you would like to try it out too, do visit the link HERE.


Malayalam Sexy Aunties Natural Photos

Designer love: the Rising Star of Melody Miller


OK, so if you've been reading this blog for a while you'll know I adore watching the new fabric collections come out. I wait with excitement twice a year for the new collections from my fav designers.

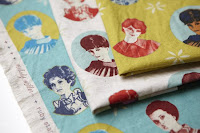
But tonight I stumbled across a new US-based designer who is just starting out, releasing her first line with Kokka literally at Christmas. And first her range, and then her blog, stopped me in my tracks. Like Helen Dardik, or Heather Ross, who I adore and who also prints her designs with Kokka, Melody Miller's fabrics are more illustrative than 'high seasonal fashion', and would be amazing for crafting or children's wear or home decor. Like Miss Ross her first range is printed on that awesome heavier linen mix that Kokka do so well. They're exactly the kind of fabric I'd use in my crafting, rather than my lily pads.

The 'Ladies in Natural' is what caught my eye first, and then the 'Viewfinder' range, and then the rest...the whole range is so kitch and vintage and 50s and cute, all in one. I NEED them. In my lounge, my kitchen, my girls' rooms...

I was also totally captivated by her blog, which details her journey to release her first fabric line - something I'd LOVE to do. To top it off she's an active indie crafter (check out her cute elephant softies) and an artisan - I adore the style of her photography on her blog.

Take a Kit Kat break and immerse yourself in rising cleverness!

Friday, January 21, 2011

Blue butterfly

AO052

My second quilled butterfly! And it's blue! Sweet soft blue hehehe... ;)

Actually, this design is a request I got from a customer who was interested in 3 of my previous card designs. So I was asked to combine 3 different designs into 1! hehe! She was interested in my first quilled card which was a simple flower design I made using tight coils. You can view the card HERE.

She was also interested in the quilled butterfly that I made in the butterfly card at the link HERE . She wanted me to add it in this new card design. So I did as per request but changed the colors because she wanted pastel colors for her card. It's actually suppose to be a birthday card but I decided to publish it first before adding the wordings because I kinda like the card as it is without any wordings on it hehe! :)

The pop up design inside the card is actually from a thank you card that I made long time ago which she love so much and wanted me to add in this card. You can view the card at the link HERE. It's the same design but I changed the colors to match the colors of the quilled flowers. I must admit since I haven't done this pop up design for quite a while, so when I had to do it again, it was pretty tough! hehe! I've forgotten how to do it! LOL! :D Lesson learned!

I kinda like how the quilled flowers look like now compared to the ones I made the first time because the tight coils I made now looks much neater. I realised my earlier mistakes and tried to make it better this time. I also like the leaves I made because it's a combination of two different colors for each leaf. This is the first time for me to use this kind of technique. It's kinda tricky the first time but after doing it for a while, it's fun, fun, fun! :)


Thursday, January 20, 2011

This Handmade Life: In Brick & Mortar.

Oh good news!!! How I love when everything comes together :)

So ... I have been pondering (for months now) ... how I could create some sort of partnership between my love for all things handmade ... and my photography studio. I had signed a lease for a space (see my previous post) ... that was to be the photography studio. BUT the stars aligned in a different way than I had planned ... and now ... through a series of fortunate events ... I now have rented additional space in the same building ... and am able to re-introduce a new (and much improved) Studio 36 ... as well as ... a retail shop full of handmade goodies! And the shop title? You guessed it (pretend you did) ... This Handmade Life.

This Handmade Life will be filled with goodies from my Etsy site, as well as goodies from other vendors. We will also host some fun crafting classes and get-togethers. Very exciting stuff!


Want a peek at some of what the shop will contain? Well, here are a few items we will soon be carrying in the shop ...

First ... some fun, geek & chic jewelry ...


Some sweet, sweet, hand-knitted finger puppets of every variety ... including Harry Potter ...

And these awesome-can't-wait-to-get-my-hands-on kits for making felted critters (so easy to do & with awesome results) ...

As you can see ... we plan to carry some whimsical, out-of-the-ordinary goodies. Lot's more to come ... but I wanted to give you a sneak peek as to some of what we will be carrying on opening day. When is that you wonder? Our "soft-opening" is February 2nd ... and our Grand Opening is during the Downtown Bangor Art Walk scheduled for March 18th.

170 Park Street, Bangor, ME

Hours are 11-5 Wednesday thru Saturday.

Looking forward to all of it! And wait till you see the photography studio! I am so in love with it. Other area photographers are too ... and we have created a co-op. For details, please see http://www.studio36bangor.com/.

Love,

Jodi

Wednesday, January 19, 2011

Ayeen's Craft's Blog Giveaway


Oh my gosh! I almost forgot about this giveaway! Thank God I still got time to enter it! hehe! Believe it or not, today is the last day to enter this giveaway....huhuhu! I hope Ayeen will accept my entry ;)

This is Ayeen's New Year's Craft Giveaway and she is giving away all those goodies you see at the above photo! I want them all hehe!!! Especially those yummylicious colorful felt...8 different colors of them!  Love the ribbons too!

It's an easy giveaway to enter too! I'm joining it! So can you! It's not too late! ;)

View her giveaway at the link below:
http://ayeenscrafting.blogspot.com/2011/01/new-year-giveaway.html


DIY: beach-side baby pool


My Dad is always coming up with projects to build or create something using something stored in his garage. This time he’s hit upon an idea that I reckon is tops!
With a crawling baby and a four year old, trips to the surf beaches usually mean stopping them from going in the water too deep, and ending up standing in the white wash, holding on to them for dear life. After a while you just want to sit down on your towel and relax, but the babies have other ideas.
So why not create a safe little pool within arms reach next to your towels where the babies can sit, keep cool, and build sand castles around themselves at the same time? My two could happily spend half an hour in there, and you can sit and watch and relax.

To make your DIY Beach Pool:

Step One: Go through your garage and find a small tarp (or head to the Warehouse and buy a small tarp).
Step Two: Hit the beach, appropriately sun-blocked. Using a spade, dig a shallow small hole next to your beach towel.
Step Three: Lay the tarp in it, use sand to hold down the edges, and use a bucket to add about 4 bucket fulls of sea water, enough for a splash and a play.
Step Four: Sit back and watch your kids play safely! Relax!
Step Five: Shake out your tarp and take it home for next time!