This is default featured slide 1 title

Go to Blogger edit html and find these sentences.Now replace these sentences with your own descriptions..

This is default featured slide 2 title

Go to Blogger edit html and find these sentences.Now replace these sentences with your own descriptions..

This is default featured slide 3 title

Go to Blogger edit html and find these sentences.Now replace these sentences with your own descriptions..

This is default featured slide 4 title

Go to Blogger edit html and find these sentences.Now replace these sentences with your own descriptions..

This is default featured slide 5 title

Go to Blogger edit html and find these sentences.Now replace these sentences with your own descriptions..

Search This Blog

Showing posts with label fabric. Show all posts

Thursday, June 16, 2011

Spoonflower Update - Free Shipping and Kids Contest

I have been spending too much time working on a Spoonflower project I am not quite ready to share, but if you have ever thought about trying out Spoonflower...

Free Shipping
On Monday 20th June (US time) there is free standard shipping internationally, details here. Remember you don't have to design your own fabric, there are thousands of designs by other that are available for purchase, here are some of my favourites -


(Clockwise from Top Left - Movie Characters, Tea PartySummer Rose GardenSpace Alphabet)

And remember that the US dollar is very weak at the moment, and fabrics are available in 8inch x 8inch swatches, or fat quarters, so you can just get a little bit and make some gorgeous little things (see Aimee's fabric scraps post).

Kids Contest
This week's design contest is for children 12 and under - so they do a drawing or collage and then you take a photo or scan it to get a digital file to upload (details here). Entries close Tuesday, how gorgeous is this one?

Sunday, April 3, 2011

Do you Spoonflower?

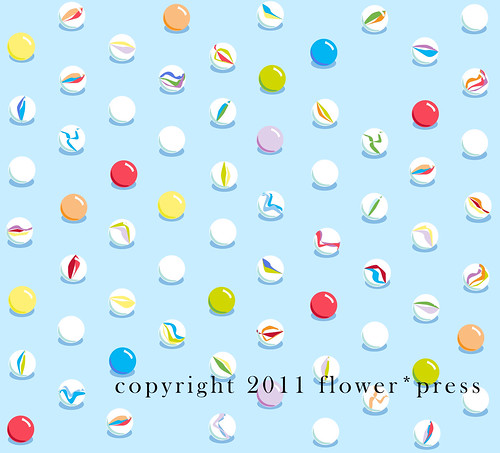
The other week at My Creative Space I loved this fabric design by Flower Press. I think it is really difficult to find nice 'boy' fabrics (although I would also use this for girls) so marbles as a spot pattern are genius (she has a giveaway this week too!)


The post led to me rediscovering Spoonflower.com, the amazing website where you can upload your own fabric design (either graphic or photo) and then they make your design in the fabric of your choice. You can also choose from thousands of other designs by Spoonflower users who have made their fabrics public.

Wondersquid by melisza

Every week there is a design competition, voted on by users, and the entries are so clever - this 'Wondersquid' design won a recent 'Squid'-themed competition, and I also love this 4th ranked design, 'Ghostly Squid Damask' that made me think of Aimee's lily pad damasks.

Ghostly Squid Damask by Pattysloniger

The current competition, Project Selvage, is co-sponsored by designer fabric house Michael Miller, and you can vote on the 75 semi-finalists here. The winner gets to design a collection for Michael Miller! The set theme was 'baby fabric for boys', and I voted for:


If you have ever ordered from Spoonflower or entered a competition, please let me know how you got on, I am absolutely fascinated by it!


Wednesday, March 9, 2011

I {heart} re-designing: retro-stylin' bucket hats...


This weeek another of the projects on my " i {heart} redesigning list for 2011" has just been completed. This one is reusing some awesome Summer retro fabric from a 2005-ish Trelise Cooper top (that was bought pre-children, and will never fit again).

I've been keeping it because I wanted to turn it into one of those awesome vintage-type bonnets that are all the rage - I simply adore the ones by Nella on Felt.co.nz and for boys, the Gottahave hats/caps on felt.co.nz as well.

But I also really like the modern Billabong kids 'revo hats' out this Summer in the surf stores - their designs takes a bucket hat, gives it a wider, floppy brim, and crosses over the brim at the back and fastens it with a velcro bit. They call it a 'pony-tail' hole, and it's meant to wrap around a little girl's pony tail (ie like a cap has) to help keep it on.
So taking these two ideas and mixing them together I came up with a wider-brimmed bucket hat, with the brim extended at the back to cross over and tie together, like a vintage bonnet. All I did to the original Butterick Baby 3782 pattern was extend the two pieces of the brim by around 15cm each, and taper them off into a point.
My bubba is having a lot of fun taking it off, putting it on, taking it off, putting it on....
And I'm pleased as punch that another project can be crossed off my project list.
For more amazing creative spaces this week check out Kirsty's blog.

Friday, February 4, 2011

I {heart} re-designing: The 1 hour Sloppy Joe t-shirt


Since I had my second daughter just over a year ago, I’ve been loving the current fashion of baggy, sloppy tops with either bat-wing arms or drop shoulders that slide sideways off your shoulder sexily. Some look like casual, 80s inspired ‘sloppy joe’ types; some look like nautical ‘Bretton’ shirts; and some are lovely, breezy 'going out' tops made in chiffon. They are super kind to post-baby tummies, sit nicely on your hips, and show off one of a women’s best assets: the décolletage.

I was determined to find a way to make these shirts, to beef up my summer wardrobe. I knew I wanted some 80s-inspired ‘sloppy joe’ types, in particular in nautical stripes; and a grey one, like a Fame-inspired look; and a long tunic/dress version in a nice black silky fabric that I could wear with a belt to work.

After much retail research, trooping around Max, Cotton On and Witchery, looking at how they are constructed, I figured it out. The secret to the style is ensuring that the front and sleeves are only made from one piece, so there's no sleeve seams, resulting in the draped, drop shoulder look.


With this in mind, I hit my Mum’s stash of patterns. What I wanted to do was re-design a simple pattern. I was after was a straight-line, square-ish type of top that I knew I could alter.

Using one of her 1980s 'easy' Butterick pattern and an even older Kwik Sew pattern to compare, I placed the pattern on the fabric, then added a couple of inches width at the fold, to make it really baggy (I measured my favourite baggy gym shirt, to give me the right width I needed). I also knew that I had to extend the neckline from a round neck to a sexier, wider ‘slit’ style. To make it look even funkier, I added 'turn ups' on the sleeves too.


Easy! I’ve made two stripy tees so far, and I absolutely love how they came out. I also lengthened them to the same length as my long tunic style tops, and they sit perfectly on my hips. The best part: they only take an hour start to finish!

Want to do something similar? Here’s my advice:


• Buy a really lightweight cotton knit from Spotlight, the cheaper and lighter the better.


• Find an old pattern in your Mum’s stash or download one of the free ones online (here's a goodie from Fitz Patterns, and it's free) that has a drop shoulder or an all-in-one body and sleeve. It doesn’t matter if it has a different back (mine had a v-dip in the back) or has a zip or is too short – we’ll be ignoring those features, and potentially widening it at the sides, too.
The free KATE batwing pattern from Fitz Patterns.


• Alternatively, find one of your own baggy gym shirts or one of your dressy ones in the same style as we’re trying to recreate; or your favourite t-shirt of your partners that you always steal!
Use this to decide the shape and width of your pattern.

• Fold your fabric in half, wrong sides together. If you are using a pattern, lay the front piece on the fold (see picture, so in effect you are cutting two 'halves' at the same time, only opposites). If you are using an old t-shirt, fold it in half, lay it on the material on the fold, and fold back the sleeve so it's only a short extension on the side, like 2-3cms, or a cap sleeve length. Trace the whole way around, or pin the shape around.

* If you need to, widen the width of the pattern so it will be baggy enough. So for example, working with half my Butterick pattern on the fold, I personally need to lay the pattern 5cm further away from the fold (giving me an extra 10cms in total in width of the shirt).

• Don’t shape the sides or the hem. Make it a straight line side.

• Keep the 'sleeve' extension of the pattern short, like a cap sleeve - 2-3cms wider than the side seam is all you need.


• Lengthen the pattern so it's more like a tunic length.


• If you can, alter tbe neck so it's wider and more like a 'slit'.


• Cut out. Now flip the fabric and pattern over - trace and cut again - so you have two pieces: an identical front and back (only opposites).


Then sew it all together and whoila! The easiest fashionable shirt in the world!

PS: I didn't learn any fancy tricks to sew with knits. I just used my normal settings, and went at a steady, if slow pace, so it didn't stretch. You don't really need an overlocker either, as t-shirt material won't fray. (Sorry mum! Yes, this is cheating).
PPS: Want to do one for your kids? On Make it and Love it this week (co-incidently) they posted on how to re-purpose two old men's t-shirts into a new baseball style shirt for kids. Check it out, it's an awesome idea!

Sunday, January 30, 2011

The launch of "I {heart} re-designing"


As well as creating new projects from scratch, or buying glorious fabric to hide away and then deciding what to do with it later, a lot of my creative time is spent “re-designing”.

This realisation only hit me on holiday this year, when I started making a ‘to do’ list of my upcoming creative projects for the year. Most of them revolved re-creating something to give it a new lease on life. Generally it’s something old, that could be useful when used a different way; or could be prettier if it was recovered or repainted; or it could be a project partly made from something I saw and bought just the other day, and had to ‘improve’.

Sometimes my re-designing is because our little family is run on a tight budget. Sometimes it’s because we are forever renovating and fixing our old house. And sometimes it’s simply a time-passing away/busy fingers moment or a way to de-stress after my day job. But mostly, it’s because I love something, can’t possibly throw it away, and need to re-use it to justify keeping it. (That's when it counts as not hoarding, right?)

So I started talking to my wonderful partner in this blog, Greta, and we decided that between us, we have a million projects already finished and sitting around, under construction or on the 'to do list' this year that fit this bill. Some of them include:


• Reusing cool old boxes and Formula tins as kids toy tidies, covered in fabric;
• Rescuing abandoned rattan furniture in the inorganic collections, rethreading the twine in the broken seats, and repainting them (I’ve done this twice!)
• Reusing the old kitchen bench as a new computer desk in the study
• Recovering the old dining table chairs with a funky black vinyl, totally changing their look
• Rescuing old wooden furniture off family and friends, sanding and repainting it to give it a new life
• Reusing favourite clothing pieces or tea towels to make new cushion covers
• Cutting up an old Trelise Cooper top I can't throw away (but will never fit again) to make a sun hat for my baby
• Changing an old 80s pattern into a modern ‘sloppy joe’ sexy t-shirt
* Fabric painting designs on clothing or shoes
• Repurposing a little girls Butterick pinafore dress pattern into a strappy sundress and piecing together some favourite fabric offcuts to create a modern look.

So one sunny afternoon on holiday I decided that while they don’t always involve fabric, my projects always involve craft, colour, family and love, and they should count as writing fodder for this blog. And Greta agrees. Some of the above list (which we will come back to and hyperlink as we go) could even be ‘tutorials’.

We’ve designed a little button that will identify these “re-design” projects so they’re easy to spot (see left). We’d love it if you could use it too on your blog posts about your re-design projects, and link back to ours, leave a comment below, and share the ideas around. We'd love to create a master list of great re-design ideas (we've even made a special tab at the top of our blog to keep them handy). Some of our favourites by others we'd love to be there include:

Cotton Kiwi's Sock Monkeys and Vintage Tea Cup pincushions (I have made two monkeys, with two more half finished for presents)
• A Little Vintage’s custom made dolls that use heirloom fabrics and baby clothes (I have four so far made in my special fabrics)
Songbird Designs' fabric covered hair bobbles (I own TONNES of these)
Amy’s Button Necklaces.
Moon Mum’s vintage wallpaper and buttons birdie art (I used these in my baby's room)
* Turning your husband's shirt into a little girl's dress on Made by Dana (I promise to do this in Feb, this month coming! I have chosen the shirt)
• Turning a kid's t shirt into a dress on Make It or Love It
Made by Rae’s ‘altering’ of patterns from McCalls.

My first offical “I love re-designing” post will be “The One Hour Sloppy Sexy Joe” t shirt. Watch this space!

Sunday, November 22, 2009

Designing Fabrics With Spoonflower.

Prior to my recent adventure in photography studio proprietorship, I took some time to make some of my own fabric designs with the help of Spoonflower. It was a bit addictive ... and I chewed many fingernails while waiting for my fabric package to arrive.


It finally arrived this week, and I couldn't be happier!


Truth be told, the actual fabrics came out better than I expected. I simply bought a fat eighth of each --- to check for design flaws, coloring, etc. --- and I loved them all.

The above fabric is titled "The Stache is Back". I didn't know I was going to fall victim to this new mustache craze ... but I fell for it ... and am so in love with my retro ladies wearing staches! I have already used this fabric to sew up some make-up bags (which will appear on Etsy soon).

And here is my "Make Love, Not Evil" design. I have also already cut into this one for some sweet little projects ... and I am in love with it. I am a Vader lover ... so this fabric is just totally cool in my opinion (though Isaac hates it).

Then, there is this super cool "Vespa Love" fabric ... which has already sold on Spoonflower! In fact, I should mention that you can purchase any of my designs right here on my Spoonflower profile page. I receive $1.10 for every yard sold (thank you!).

And lastly, the above fabric, titled "Snowbirds in Love" is my absolute favorite. It was designed using one of my photographs as a backdrop for the birds. I so love it --- which is why I have yet to cut into it --- I just keep staring at it.

So - have you tried Spoonflower yet? It is SO much fun! Not only can you create your own fabrics, but you can also shop for some amazing, one-of-a-kind designs created by other artists. Check it out.

Hopefully tomorrow I will be showing you some of the goodies I made with the above fabrics. I tend to hang in the studio whenever possible --- but am trying to find time to craft (and share) for the holidays.

Chat with you soon!

Love,

Jodi

Saturday, October 11, 2008

Feast Away on the Inexpensive Fabric Goodness ...

Ok, I know it's a Saturday ... and its beautiful out ... and I should not be in the house blogging or doing anything computer related ... BUT I just had to drop in to let you crafty folks that I have lowered the prices of several of my fabrics / fabric bundles on Etsy. As much as I adore fabric, I don't think I will continue to post any on the "This Handmade Life" etsy shop. Perhaps another shop and another time ... until then, feast away my friends on the goodies ...

Love,
Jodi

Friday, January 18, 2008

Swimming in Fabric... and About to Drown.

I have collected fabric for years. And I thought I had stashed away way more than I could ever use in a lifetime. But then, I inherited more ... lots more. I mean, LOTS more. So, slowly but surely, I have been weeding through it all in an effort to downsize my collection to a manageable size for our big move. It has not been easy. I mean, I LOVE fabric. And I am finding ever so many more uses for it all. But there is just no way that my new home (or any home for that matter) can support the sort of fabric fetish that I have going on.

So, part of my weekend will be spent sorting through fabric and reluctantly parting with pounds and pounds of it. And for anyone interested in purchasing some fabric treasures ... you can check out our sale site here: www.estatefabrics.blogspot.com.

Enjoy your weekend.
Love,
Jodi