This is default featured slide 1 title

Go to Blogger edit html and find these sentences.Now replace these sentences with your own descriptions..

This is default featured slide 2 title

Go to Blogger edit html and find these sentences.Now replace these sentences with your own descriptions..

This is default featured slide 3 title

Go to Blogger edit html and find these sentences.Now replace these sentences with your own descriptions..

This is default featured slide 4 title

Go to Blogger edit html and find these sentences.Now replace these sentences with your own descriptions..

This is default featured slide 5 title

Go to Blogger edit html and find these sentences.Now replace these sentences with your own descriptions..

Search This Blog

Showing posts with label re-design. Show all posts

Friday, August 5, 2011

Silhouette families - Post Number two!


Last week Greta posted about her gorgeous silhouette art works she'd made of her children - I just loved them to pieces.


I was going to copy her and make some of my own...but at my work at the moment, I'm learning how to use computer graphics programmes to 'clear cut' images - which means removing the background around an image of a person or object, to make it look a bit more arty on your website.


So I wondered about trying to combine the two, and with the help of Google found two tutorials that explain how to a) clear cut and b) turn into a silhouette!


At home I use paint.net (a free downloadable version of paint that is one step up, and more like photoshop) so these instructions here and here worked a treat. I would really recommend downloading paint.net if you are into graphics and creating art on the computer.


Once I had taken the photos to get the image for the silhouettes (like Greta, I took individual photos of our family against white backgrounds) I then imported the pictures into paint.net and followed the instructions. Then I googled 'family tree silhouette image' and found a couple of trees I liked the look of (make sure to choose images as big as you can, not clip art size - or they come out too pixelated), and started layering up the images on top of each other in paint.net, to create the over-all effect.


Print it on a computer and away you go!


Next I might do it again, but 'inverse' the lines into white, and print on a bright coloured piece of paper.


But I'm not sure which tree I like better - perhaps the coloured one will fit in best in the family room.


Wednesday, June 15, 2011

Planning my new house: Room no 1 - lounge


Wallpapers by the great Amy Butler; green shag cushion with tutorial from V and Co; white plantation shutters; modular corner sofas in browns (here from Freedom); white lacquered furniture; artwork by Gretchen Albrecht; factory and topography inspired artworks; antique photo frames; lily pad fabrics as cushions.


The lily pad household is on the move, and the excitement at nesting in a new place is mounting. Every spare second (of which there are really none) is spent thinking about what items of our furniture to take, and what to start fresh with.

Room One taking up most of my dreaming and planning is the lounge, mostly because I am going to relegate my current black couches to the family room and buy new sand/brown ones for the big 'adults' lounge. While I still love my black-white-red theme in the kitchen and family areas, rather than creating yet another room in the same style, I've dedicated to be brave and expand my colour palette and bring in browns, navy and teal greens.


The colour combo was initially inspired by my favourite designer of all time, Amy Butler, and her new wallpaper ranges (see above), as well as my research in new season colour influences from colour expert Pantone, as well as a spread in Homestyle magazine. But it has also allowed me to incorporate my love of pattern, and so I'm going to use my highly decorative, damask navy and green lily pad fabric on some cushions for a personal touch and make a shaggy green cushion. I'm also loving all these cool accent pieces below from http://www.felt.co.nz/ - oopsey daisy, I might have already bought the decorative mounted deer head even before we move!
Interactive wallpaper - magnetic wall art
$109.00
VINTAGE 100% NZ WOOL CUSHION WITH TUI MOTIF
$65.00
sky blue cuckoo clock
$150.00
small peacock wall clock
$45.00
Silver & black taxidermy deer
$40.00
Fantail cushion
$45.00

I'm also brainstorming my own large scale canvas multi-media artwork for the lounge wall - more on that later. Clue One: Hessian coffee sacks from NZ company Avalanche thanks to a friend of a friend (thanks, Paul). Seriously such good coffee, have you bought some yet? Clue Two: Sewing and layering. Clue Three: Pattern and shape. Clue Four: oil paint?

But for up on the stunning wall with an original plaster fireplace mantle built in, I'm looking at purchasing this gorgeous 'Winged Spill" print by New Zealand artist Gretchen Albrecht pictured above. I love the mix of deep, mulled wine and forest colours - and it reminds me too strangely, of my daugher's love of rainbows. A little bit of playfulness in my otherwise seriously 'adults' retreat' style room.

Next up: ideas for my girls' new shared room.

Wednesday, April 20, 2011

Little Miss Lily Pad's Fifth birthday....


Blue fishpond jelly; takeaway popcorn boxes; LouLou making mermaid gingerbreads; frothy wave cupcakes.


Maddie in her costume; her Mermaid Barbie cake; making popcorn boxes.


Sunday was my first daughter Maddie's fifth birthday party, and it was chaos -but fantastic fun. In typical Lily Pad style, between the two of us we 'designed' a party made from a lot of homemade, handmade items - and had an absolute ball preparing together.


The theme was 'Under the Sea' - an idea which we stretched our imaginations a bit for, in order to make her original idea of a Barbie Mermaid party suit all our friends, boys included. Maddie hates to leave out her two best boy buddies, Tyler and Campbell, so she suggested the wider theme. We asked them if they'd like to come as pirates (they looked fantastic) - and lead the 'treasure hunt'. To make the treasure hunt, we hid gladwrap sandwich bags of small balls, packs of playing cards, gold chocolate coins, notebooks and pencils in the clam shell pit, then Maddie drew a map with "X marks the spot", and hubby traipsed the two pirates, Maddie, and all the other littlies on a wild goose chase all around the property and back to the clam shells. There they 'dug for treasure' with teaspoons til all the prizes were found.


The second game was 'pin the tail on the mermaid', which Maddie and I drew together earlier in the week, and she painted. Our decorating theme included giving each child a pair of paper 'googles' to wear under the sea (a ceiling full of blue balloons and green seaweed), a table of food sitting on top of a striped picnic rug, instead of a table cloth, bunting flags (another great excuse to use the free alphabet bunting downloads I love on ruffled) and an activity getting the kids to decorate gingerbread mermaid and starfish cookies with coloured icing and sprinkles.


Once all the welcome games and activities were over, the kids had a picnic on a blue beach towel, with 'takeaway popcorn' in boxes, 'fish 'n' chips' wrapped in takeaway packages of newspaper and wax paper, and 'goldfish bowl' blue jelly with fish lollies inside.

Instead of a loot bag, each child took home their googles, a balloon, and their own gingerbread cookies.


I have to admit I went all out for this party and made a mermaid outfit for Maddie, as well as a 'guppie' outfit (skirt and tail) for my little one year old. They looked so cute!


I also spent a lot of time thinking about her cake, which I made the night before, and kept a big secret. She was quite overwhelmed/excited/blown away and unfortunately cried when it was time to blow out the candles! Oops - too much for one small child!

It's quite wierd now, with the big party over, and the waiting game of two weeks of school holidays before she's off to school for her first day. Lots of time to write names on clothing and stationary, but also a big build up! I hope it goes well.


Love you HEAPs Maddie Moo, and I'm so proud of you


xxx

Monday, April 18, 2011

Baby Bites: Easter craft goodies....


This week on BabyBites I took the time to search out some funky and cool Easter craft activities! It's always time to craft when the school holidays co-incide with Easter. My five year old adores making things.


One of my favourite blogs, oh my! handmade goodness, has put together a fantastic round up of 25 of the coolest Easter projects.


Top of my list: 'Not Martha's chocolate-filled real egg with a surprise inside, like a kinder surprise! I can't wait to try rolling the liquid chocolate around inside the egg. This is definitely a job for size 8 eggs. Then I think I"ll hide them inside these super easy, super cool egg cosies made from outgrown jumpers - fits perfectly with our re-design and upcycling theme on this blog!


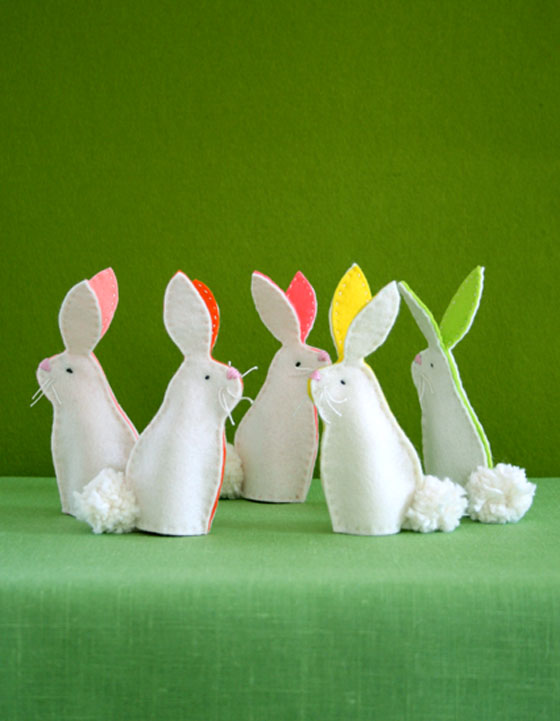
Or if we get time, these felt bunnies.


Yum and fun! Check out the full list of oh my! handmade goodness Easter suggestions here.


For my original column and lots more for kids and mums, visit http://www.babybites.co.nz/

Wednesday, April 13, 2011

When Golden Books become golden treasures


What do you do when your treasured vintage books fall apart at the spine, or rip and become illegible? These clever crafters pay homage to their special childhood tales by upcycling their destroyed pages. The stories live on for another generation...and might encourage your children to want to go op-shopping with you and ‘save’ more books destined for destruction, unless a loving family takes them home. Check out Mini-eco’s upcycled paper garland of the Tawny Scrawny Lion …or Cat Taylor’s Richard Scarry birthday party invitations ...or Ruby in the Dust’s rebound Golden Book with extra blank pages for children to write notes…


Now I know what to do with my beloved Dr Seuss pages that lost their cover and companion pages two decades ago! Time to dust them off and restore them to glory…

Wednesday, March 9, 2011

I {heart} re-designing: retro-stylin' bucket hats...


This weeek another of the projects on my " i {heart} redesigning list for 2011" has just been completed. This one is reusing some awesome Summer retro fabric from a 2005-ish Trelise Cooper top (that was bought pre-children, and will never fit again).

I've been keeping it because I wanted to turn it into one of those awesome vintage-type bonnets that are all the rage - I simply adore the ones by Nella on Felt.co.nz and for boys, the Gottahave hats/caps on felt.co.nz as well.

But I also really like the modern Billabong kids 'revo hats' out this Summer in the surf stores - their designs takes a bucket hat, gives it a wider, floppy brim, and crosses over the brim at the back and fastens it with a velcro bit. They call it a 'pony-tail' hole, and it's meant to wrap around a little girl's pony tail (ie like a cap has) to help keep it on.
So taking these two ideas and mixing them together I came up with a wider-brimmed bucket hat, with the brim extended at the back to cross over and tie together, like a vintage bonnet. All I did to the original Butterick Baby 3782 pattern was extend the two pieces of the brim by around 15cm each, and taper them off into a point.
My bubba is having a lot of fun taking it off, putting it on, taking it off, putting it on....
And I'm pleased as punch that another project can be crossed off my project list.
For more amazing creative spaces this week check out Kirsty's blog.

Monday, February 21, 2011

I {heart} re-designing - Felt Tip Couture Shoes

We love customising and re-designing, but it never occurred to me that shoes could be customised too! You can draw straight on to canvas shoes with the right pens and it is SO much fun.


This tutorial on The Craft Revival used kids shoes, but I thought I would try some adult ones... inspired by this Wonder Woman* patch, I drew some bold shapes (first in pencil, then black) and then just coloured in like a colouring book - fun! I love how the blue has come out looking like denim.


Of course the pens are going to go further on small shoes... I left the sides plain white so I wasn't just using up ink (I think I will do some stars on the back panel).


The pens are Faber-Castell Pitt Artist Pens and I found them in an art shop - the colours are in packs and work out to be about $5 each, but you could buy a single black one and try monochrome too (the key is that they are waterproof once dry). I'm not sure how far they will go - I am going to try some for Miss 4 next.
*Like Strawberry Shortcake dolls, the Wonder Woman TV series is one of my most vivid childhood memories - and it is about to be re-made...

Wednesday, February 9, 2011

My Creative Space: bum-shuffler pants


My Creative Space this week is filled with scraps of fabric and wadding, which piece by piece I am trying to put together to make a pattern for special bum-shuffler pants.

My 15-month old is a dedicated bum-shuffler who has no inclination to want to walk yet. I am getting sick of ruined leggings, shorts and MCNs (modern cloth nappies) - with ingrained dirt, food and floor messes on them, so I'm trying to come up with a solution.

She also gets grazes on her little bottom and legs a lot too, as a result of the friction. (She is SO fast!)

I figure a gusset padded inside with slim-line wadding, like what I use in my lily pads, will cushion and protect her bottom. If the gusset is made in plain black or brown or grey, to hide the stains and wear and tear, I could then use my lovely patterned lily pad fabrics to decorate the legs and make them look stylish. Maybe even with turn ups or ruffles? Maybe even turn it into a skort pattern?

If I use my 100% cotton fabrics, then she won 't get too hot in this heat. In the winter, maybe I could instead make them from merino (if she's still not walking by then!)


The great and wonderful Made by Rae blog has given me the idea for this project - she makes "Big Butt Pants" especially for babies with MCNs (modern cloth nappies) - the pocket style of cloth nappies of which I am a dedicated convert. I'm going to buy her pattern, then work on re-designing it with the wadding in the bottom, for my bum shuffler.

Wish me luck!

For other creative projects coming to life this week, visit the other bloggers over at My Creative Space on Kirsty's blog.

Friday, February 4, 2011

I {heart} re-designing: The 1 hour Sloppy Joe t-shirt


Since I had my second daughter just over a year ago, I’ve been loving the current fashion of baggy, sloppy tops with either bat-wing arms or drop shoulders that slide sideways off your shoulder sexily. Some look like casual, 80s inspired ‘sloppy joe’ types; some look like nautical ‘Bretton’ shirts; and some are lovely, breezy 'going out' tops made in chiffon. They are super kind to post-baby tummies, sit nicely on your hips, and show off one of a women’s best assets: the décolletage.

I was determined to find a way to make these shirts, to beef up my summer wardrobe. I knew I wanted some 80s-inspired ‘sloppy joe’ types, in particular in nautical stripes; and a grey one, like a Fame-inspired look; and a long tunic/dress version in a nice black silky fabric that I could wear with a belt to work.

After much retail research, trooping around Max, Cotton On and Witchery, looking at how they are constructed, I figured it out. The secret to the style is ensuring that the front and sleeves are only made from one piece, so there's no sleeve seams, resulting in the draped, drop shoulder look.


With this in mind, I hit my Mum’s stash of patterns. What I wanted to do was re-design a simple pattern. I was after was a straight-line, square-ish type of top that I knew I could alter.

Using one of her 1980s 'easy' Butterick pattern and an even older Kwik Sew pattern to compare, I placed the pattern on the fabric, then added a couple of inches width at the fold, to make it really baggy (I measured my favourite baggy gym shirt, to give me the right width I needed). I also knew that I had to extend the neckline from a round neck to a sexier, wider ‘slit’ style. To make it look even funkier, I added 'turn ups' on the sleeves too.


Easy! I’ve made two stripy tees so far, and I absolutely love how they came out. I also lengthened them to the same length as my long tunic style tops, and they sit perfectly on my hips. The best part: they only take an hour start to finish!

Want to do something similar? Here’s my advice:


• Buy a really lightweight cotton knit from Spotlight, the cheaper and lighter the better.


• Find an old pattern in your Mum’s stash or download one of the free ones online (here's a goodie from Fitz Patterns, and it's free) that has a drop shoulder or an all-in-one body and sleeve. It doesn’t matter if it has a different back (mine had a v-dip in the back) or has a zip or is too short – we’ll be ignoring those features, and potentially widening it at the sides, too.
The free KATE batwing pattern from Fitz Patterns.


• Alternatively, find one of your own baggy gym shirts or one of your dressy ones in the same style as we’re trying to recreate; or your favourite t-shirt of your partners that you always steal!
Use this to decide the shape and width of your pattern.

• Fold your fabric in half, wrong sides together. If you are using a pattern, lay the front piece on the fold (see picture, so in effect you are cutting two 'halves' at the same time, only opposites). If you are using an old t-shirt, fold it in half, lay it on the material on the fold, and fold back the sleeve so it's only a short extension on the side, like 2-3cms, or a cap sleeve length. Trace the whole way around, or pin the shape around.

* If you need to, widen the width of the pattern so it will be baggy enough. So for example, working with half my Butterick pattern on the fold, I personally need to lay the pattern 5cm further away from the fold (giving me an extra 10cms in total in width of the shirt).

• Don’t shape the sides or the hem. Make it a straight line side.

• Keep the 'sleeve' extension of the pattern short, like a cap sleeve - 2-3cms wider than the side seam is all you need.


• Lengthen the pattern so it's more like a tunic length.


• If you can, alter tbe neck so it's wider and more like a 'slit'.


• Cut out. Now flip the fabric and pattern over - trace and cut again - so you have two pieces: an identical front and back (only opposites).


Then sew it all together and whoila! The easiest fashionable shirt in the world!

PS: I didn't learn any fancy tricks to sew with knits. I just used my normal settings, and went at a steady, if slow pace, so it didn't stretch. You don't really need an overlocker either, as t-shirt material won't fray. (Sorry mum! Yes, this is cheating).
PPS: Want to do one for your kids? On Make it and Love it this week (co-incidently) they posted on how to re-purpose two old men's t-shirts into a new baseball style shirt for kids. Check it out, it's an awesome idea!

Sunday, January 30, 2011

The launch of "I {heart} re-designing"


As well as creating new projects from scratch, or buying glorious fabric to hide away and then deciding what to do with it later, a lot of my creative time is spent “re-designing”.

This realisation only hit me on holiday this year, when I started making a ‘to do’ list of my upcoming creative projects for the year. Most of them revolved re-creating something to give it a new lease on life. Generally it’s something old, that could be useful when used a different way; or could be prettier if it was recovered or repainted; or it could be a project partly made from something I saw and bought just the other day, and had to ‘improve’.

Sometimes my re-designing is because our little family is run on a tight budget. Sometimes it’s because we are forever renovating and fixing our old house. And sometimes it’s simply a time-passing away/busy fingers moment or a way to de-stress after my day job. But mostly, it’s because I love something, can’t possibly throw it away, and need to re-use it to justify keeping it. (That's when it counts as not hoarding, right?)

So I started talking to my wonderful partner in this blog, Greta, and we decided that between us, we have a million projects already finished and sitting around, under construction or on the 'to do list' this year that fit this bill. Some of them include:


• Reusing cool old boxes and Formula tins as kids toy tidies, covered in fabric;
• Rescuing abandoned rattan furniture in the inorganic collections, rethreading the twine in the broken seats, and repainting them (I’ve done this twice!)
• Reusing the old kitchen bench as a new computer desk in the study
• Recovering the old dining table chairs with a funky black vinyl, totally changing their look
• Rescuing old wooden furniture off family and friends, sanding and repainting it to give it a new life
• Reusing favourite clothing pieces or tea towels to make new cushion covers
• Cutting up an old Trelise Cooper top I can't throw away (but will never fit again) to make a sun hat for my baby
• Changing an old 80s pattern into a modern ‘sloppy joe’ sexy t-shirt
* Fabric painting designs on clothing or shoes
• Repurposing a little girls Butterick pinafore dress pattern into a strappy sundress and piecing together some favourite fabric offcuts to create a modern look.

So one sunny afternoon on holiday I decided that while they don’t always involve fabric, my projects always involve craft, colour, family and love, and they should count as writing fodder for this blog. And Greta agrees. Some of the above list (which we will come back to and hyperlink as we go) could even be ‘tutorials’.

We’ve designed a little button that will identify these “re-design” projects so they’re easy to spot (see left). We’d love it if you could use it too on your blog posts about your re-design projects, and link back to ours, leave a comment below, and share the ideas around. We'd love to create a master list of great re-design ideas (we've even made a special tab at the top of our blog to keep them handy). Some of our favourites by others we'd love to be there include:

Cotton Kiwi's Sock Monkeys and Vintage Tea Cup pincushions (I have made two monkeys, with two more half finished for presents)
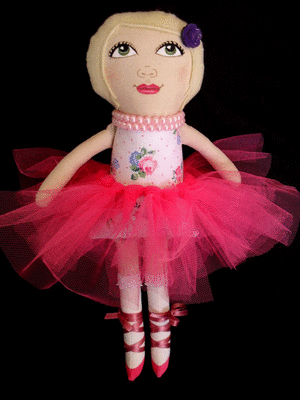
• A Little Vintage’s custom made dolls that use heirloom fabrics and baby clothes (I have four so far made in my special fabrics)
Songbird Designs' fabric covered hair bobbles (I own TONNES of these)
Amy’s Button Necklaces.
Moon Mum’s vintage wallpaper and buttons birdie art (I used these in my baby's room)
* Turning your husband's shirt into a little girl's dress on Made by Dana (I promise to do this in Feb, this month coming! I have chosen the shirt)
• Turning a kid's t shirt into a dress on Make It or Love It
Made by Rae’s ‘altering’ of patterns from McCalls.

My first offical “I love re-designing” post will be “The One Hour Sloppy Sexy Joe” t shirt. Watch this space!

Friday, January 7, 2011

Holiday Sewing Fun


Over the holidays I've stayed up late with a glass of wine, notepad and pair of scissors with Misses Amy Butler, Patricia Bravo, Tina Givens, and Anna Maria Horner. Late night decisions were made on their future.


The end result was my first ever attempts at 'designer' children's clothes: a few skirts and sun frocks for my two girls and my neice in my favourite colours of these designers' prints.


What do you think? I repurposed a basic drop-waist Butterick girls dress pattern, and came up with a strappy empire-line frock, and a drop-waist skirt. Then I also finally got to use a free blog pattern I've been saving for ages, spotted on Lil Magoolie, but originally from Prudent Baby. I love how they came out!


Calico & Co.
I"m entering these in the "January Creative Collective Challenge" over with the gals in Melbourne, Australia.


Did you try your hand with something new over the holidays?

Friday, September 24, 2010

Christmas spoiler alert: heirloom dolls


I really hope my children, Miss M and Baby L, don't see these on my computer screen - nor my niece Miss T. If they do, my Christmas surprise from their Gran will be spoilt! Check out what the amazing Jennie @ A Little Vintage has done for me! Dolls made especially in their image and 'upcycling' some very special fabrics. Read Jennie's blog for the full story of how and why they were made the way they were.

Thnx Jennie - this means so much to me! xoxo
(And thanks Mum - Gran - for parting with special sentimental family fabrics xoxo)